Finished - the Sierra Jumpsuit
Hello
friends, I thought it time to dust off the old bloggo for another year. I’ve
been sewing, regularly and mostly successfully, but not too many new patterns,
mostly repeats of old favourites. But last November was Melbourne Frocktails,
and I wanted to make something a bit swish that wasn’t a knit.
I
was drawn to Papercut Patterns Sierra jumpsuit after seeing Heather Lou’s gorgeous linen version. I feel Heather and I have a similar body shape, and
hers looked so fab on her it was worth the time and investment. I decided that
in a solid black I’d be able to get some decent wear from it throughout summer
- dressed up or dressed down with the right shoe. The fabric I chose is a
linen-Tencel blend, from Darn Cheap Fabrics - as you can see it creases pretty
much like linen but it’s a little drapier and more refined than linen, great
for a garment that doubles for day and night wear. The bodice is lined in black
cotton voile.
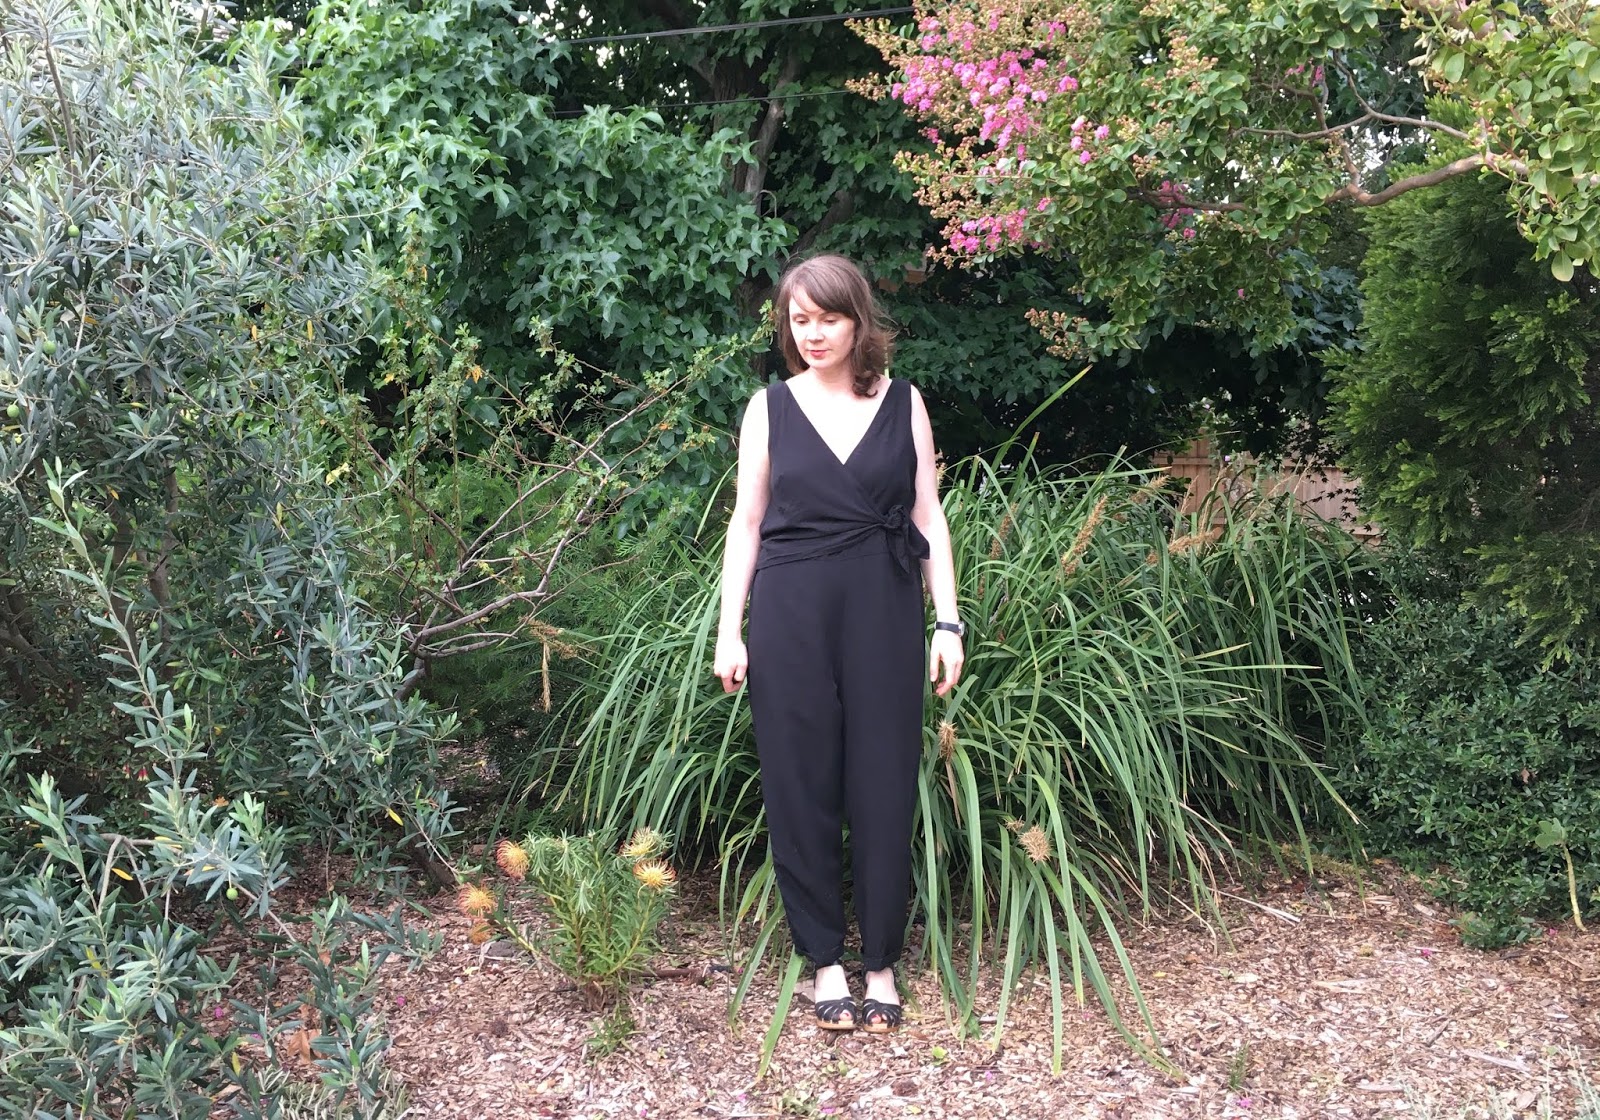
As I
mentioned above I made this in October last year, and since making this I’ve
lost 5kg. So the photos don’t really do it justice. It’s just too big now. I
did want to get it blogged though, as (unsurprisingly) I have many thoughts,
opinions and adjustments to comment on.

I
made a toile for this. You’d be crazy not too. Not just for fitting purposes
but for a little primer in the construction. I feel most grateful for the
several ladies who had already made and blogged this - without their excellent posts I would have really stumbled. My husband and I are firm believers
in the 5 P’s (prior preparation prevents pisspoor performance) and boy did I do
my homework with this one.

When
toiling I cut a large, as that’s what my measurements put me in. It’s
definitely a roomy fit. In the end I could have gone with a medium on top and
been fine. I cut the playsuit (shorts version) to save time and fabric. The
armscye was gaping a heap, so I removed 2cm of excess fabric and rotated this
into the bust dart. This had the useful effect of raising the armhole. The
armhole was still too low (nursing bras sit a lot higher) so I raised them by
another 2cm. It was a little wide under the arms, so for the final version I
trimmed down to a medium above the dart. The centre back was about 1.5cm too
low, showing my bra, so this was an easy fix.

I
found the shape of the front crotch curve all wrong for me (not a surprise when
you look at my Palisade Pants post) so subbed it in with the Sew Liberated
Arenite Pants curve - this had the effect of shortening the front crotch curve.
It still was just a little long in the final version - I could feel my upper
thighs touching, but this can be super tricky in a jumpsuit. It’s important to
avoid over shortening the crotch depth and giving yourself a wedgie if you
raise your arms.
I
did add in a 2cm full seat adjustment, just as a little precaution. In the
final version I narrowed the legs a little (just by increasing the seam
allowance to 15mm. I left out the zip as I found, as many others have, that I
could wiggle out without it. I also chose to leave off the pockets. I don’t
like hip pockets that aren’t incorporated into a waist seam, and I felt that
adding them to this would really add to bulk at the hip line. I couldn’t be
bothered redrafting them to be caught in the waistline, so that was that.

I
know that seems like a lot of alterations, but it really was just a few tweaks
here and there. But in my opinion the instructions really aren’t stellar, and
there’s a few unnecessary steps that just add work without any obvious benefit
to the garment.
- I agree with Heather Lou, that labelling the front
bodice and lining pieces left and right would have been much simpler. I
established which was which (left or right) before I cut out my fabric,
and labelled them with pieces of washi tape that didn’t get removed until
the piece was sewn - I labelled with the pattern piece name, left or
right, and then right side or wrong side. Saved me a huge amount of
stress, particularly in fabrics that have no right or wrong sides.
- I chose to overlock the bottom edge of the back
facing and the bottom edge of the lining of the front long wrap piece. The
instructions say to bind it. This would add unnecessary bulk especially at
the junction of the wrap and the bodice. Plus it wastes time. I ended up
just turning under the front seam allowance of the lining and hand
stitching it in place. It’s neat and has almost no bulk, and actually didn’t need to overlock it at all!
- I avoided the zip and pockets so can’t comment on those
instructions.
- I avoid cutting the interfacing pieces for the front
neckline and armscyes, instead used fusible stay tape such as this (here’s a tutorial on making your own). Saved a huge amount of time.
- The back facing and front linings are drafted identical
in size to the bodice shell - even with understitching they have the
tendency to peek out. Next time I’d shave a few mm off especially at the
armscye and back V.
- The junction where the bottom front wrap piece (the
long piece) joins the bodice is quite messy and a bit weak - this is where
binding the lining would have made things even more bulky and messy. I
ended up doing a little bartack through the layers to secure everything.
Hard to explain unless you’ve made it, and as it’s the underlayer of the
wrap it’s invisible.
Despite
my alterations and pattern critique I was thrilled with my finished Sierra and
had a fabulous night at Frocktails. I managed to squeeze in wearing it to two more events, my
little man’s 2nd birthday party and a Christmas party - so not bad compared to
other fancy Frocktails garments I’ve only worn once or twice. I’m rather sad
that it is so big on me now and have considered taking it in, but it would
require a huge amount of deconstruction. I’d rather keep the finished garment
as is, maybe find it a new home and make myself another next summer.
We’ll see
- there’s always something else in the queue, isn’t there? ;)
This is a very good idea, I also like it very much and I hope you will like my JUMPSUIT
ReplyDeletetencel pants womens Thanks for share this amazing kind of information with us.
ReplyDeleteNice article. This is very useful blog. Thanks for sharing. Kids Shoes
ReplyDeleteThanks for sharing such a great information with us. Baby Care Products
ReplyDeleteInteresting post.Thanks for sharing. Happy Mums is here to make parenting a breeze with our exceptional baby accessories. From adorable bibs and burp cloths to stylish diaper bags. Baby Accessories
ReplyDeleteVery useful blog. Happy Mums understands that dressing your baby in comfortable and stylish clothing is essential. Top Baby Toys, Care Items, and Clothing in Pakistan
ReplyDeleteThanks for this nice article. Jump Suits
ReplyDeleteInteresting post.Thanks for sharing. Frocks for Girls
ReplyDeletelab coats act as a protective barrier against spills, splashes, and airborne particles, shielding the wearer's clothing and skin from hazardous substances and contaminants commonly found in laboratory environments.
ReplyDeleteCake pearls silicone molds
ReplyDeleteare a fantastic tool for creating edible pearls to decorate cakes, cupcakes, and other desserts. These molds come in various sizes and designs, allowing bakers to produce consistent, professional-looking pearls with ease. Here are some tips and steps for using cake pearls silicone molds
Nursing jobs in Australia offer Indian nurses unparalleled opportunities for professional growth within a well-regarded healthcare system. Indian nurses can work in varied environments, including hospitals, aged care facilities, and community health centers, undertaking responsibilities such as patient care, medication administration, and assisting with medical procedures. The supportive multicultural work environment and competitive salaries make these roles highly appealing. Indian nurses are particularly esteemed for their clinical expertise, dedication, and adaptability. To practice in Australia, meeting the NMBA's registration requirements, which include passing an English proficiency test and fulfilling specific educational qualifications, is necessary. This makes Australia an inviting destination for Indian nurses seeking a fulfilling and rewarding career.
ReplyDeletehttps://dynamichealthstaff.com/nursing-jobs-in-australia-for-indian-nurses
The Breast Cancer Hospital in Gurgaon stands as a leading institution in breast cancer care, utilising state-of-the-art diagnostic and therapeutic technologies. The facility offers a full spectrum of services, from early detection to advanced treatment solutions. Under the leadership of distinguished specialists like Dr. Deepak Jha, the hospital provides tailored and compassionate patient care. A multidisciplinary approach ensures comprehensive treatment, combining expertise in surgery, medical oncology, and radiology. The hospital is dedicated to ongoing breast cancer research, enhancing treatment protocols. Community outreach and education initiatives are key components, raising awareness and promoting prevention. The Breast Cancer Hospital in Gurgaon is a beacon of hope for patients, offering unparalleled expertise and support.
ReplyDeletehttps://www.breastoncosurgery.com/know-the-doctor/profile
Dr. Kavita Sharma is celebrated as the best neuroendocrine cancer surgeon in Ahmedabad, combining exceptional surgical skills with a compassionate approach to patient care. With over twenty years of experience, Dr. Sharma specializes in advanced minimally invasive procedures and complex reconstructive surgeries, ensuring the highest standards in patient outcomes. She leads a dedicated multidisciplinary team, creating personalized treatment plans tailored to each patient's unique needs. Actively involved in groundbreaking research and clinical trials, Dr. Sharma remains at the forefront of medical innovation. Her commitment to patient education empowers individuals to make well-informed health decisions. Known for her empathetic and comprehensive care, Dr. Sharma's expertise is widely respected by both her peers and patients.
ReplyDeletehttps://drvirajlavingia.com/services/neuroendocrine-cancer-specialist-in-ahmedabad
Dr. Anjali Patel is a prominent breast cancer surgeon in Mumbai, celebrated for her meticulous diagnostic skills and compassionate patient care. With over twenty-five years of experience, Dr. Patel specializes in both minimally invasive procedures and advanced breast surgeries, delivering exceptional patient outcomes. She leads a proficient multidisciplinary team to devise personalized treatment plans for each patient. Actively involved in innovative research and clinical trials, Dr. Patel ensures her patients have access to the most recent advancements in breast cancer treatment. Her dedication to patient education empowers women to make informed health decisions. Respected by her peers and adored by her patients, Dr. Patel’s holistic and empathetic approach emphasizes her leadership in the field.
ReplyDeletehttps://drnitanair.com/contact/contact-dr-nita-nair-mumbai
Dr. Shona Nag is a preeminent breast cancer surgeon based in Pune with over 20 years of dedicated experience. Her patient-centric approach prioritizes early detection and personalized treatment plans tailored to each individual's needs. Renowned for integrating cutting-edge technologies and innovative therapies, Dr. Nag delivers optimal patient outcomes. She is also a key contributor to breast cancer research and education, frequently speaking at national and international medical conferences. Dr. Nag's compassionate and holistic care has earned her deep respect among peers and patients alike. Known for her unwavering commitment to advancing breast cancer treatment, she remains a trusted name in the field.
ReplyDeletehttps://www.drshonanagbreastcancer.in/understanding-cancer/what-is-cancer-can-cancer-be-cured
Ecommerce website design in Delhi provides businesses with the essential tools to succeed in the online retail environment. This service focuses on creating user-friendly, visually appealing online stores tailored to specific business needs. Incorporating key features such as secure payment gateways, efficient inventory management, and responsive design ensures a seamless shopping experience across devices. Local designers leverage their expertise to enhance SEO, improving website visibility and attracting potential customers. Customisation options allow businesses to align their digital presence with their branding and marketing strategies. Additionally, ongoing support and maintenance help keep the ecommerce platforms updated and functional. By adopting a customer-centric approach, this design service empowers businesses to engage effectively with consumers and drive sales. Ultimately, ecommerce website design in Delhi enables companies to tap into the vast opportunities of the digital marketplace.
ReplyDeletehttps://olycoder.com/ecommerce-website-design-delhi
This comment has been removed by the author.
ReplyDeleteThe Sierra Jumpsuit looks fantastic! Love the fit and fabric choice—perfect inspiration for sewing projects.
ReplyDeleteMaternity bras and panties
Shop our elegant gold necklace set online
ReplyDeleteand add a touch of timeless beauty to your collection. Perfect for any occasion, crafted for style and sophistication. ✨💛"
Minoxidil for Men in Australia is a popular topical solution used to address hereditary hair loss. This FDA-approved treatment works by stimulating hair growth and slowing hair loss, making it an effective solution for men experiencing thinning hair. Available over the counter, Minoxidil is generally applied directly to the scalp twice a day. It is important for users to apply it consistently over several months to see noticeable results. While Minoxidil is generally safe, some users may experience mild scalp irritation. It is also worth noting that results can vary from individual to individual. For those in Australia seeking a solution to combat hair loss, Minoxidil offers an accessible and proven option to consider in their hair care regimen.
ReplyDeletehttps://generichealth.com.au/minoxidil-hair-loss/
I love the versatility of a jumpsuit dress—it’s the perfect blend of comfort and style! I recently came across KoAi’s collection and was blown away by their modern silhouettes and earthy prints. Their take on the jumpsuit dress is so unique, it’s a total must-have for anyone who loves effortless fashion with a statement edge.💛✨
ReplyDelete