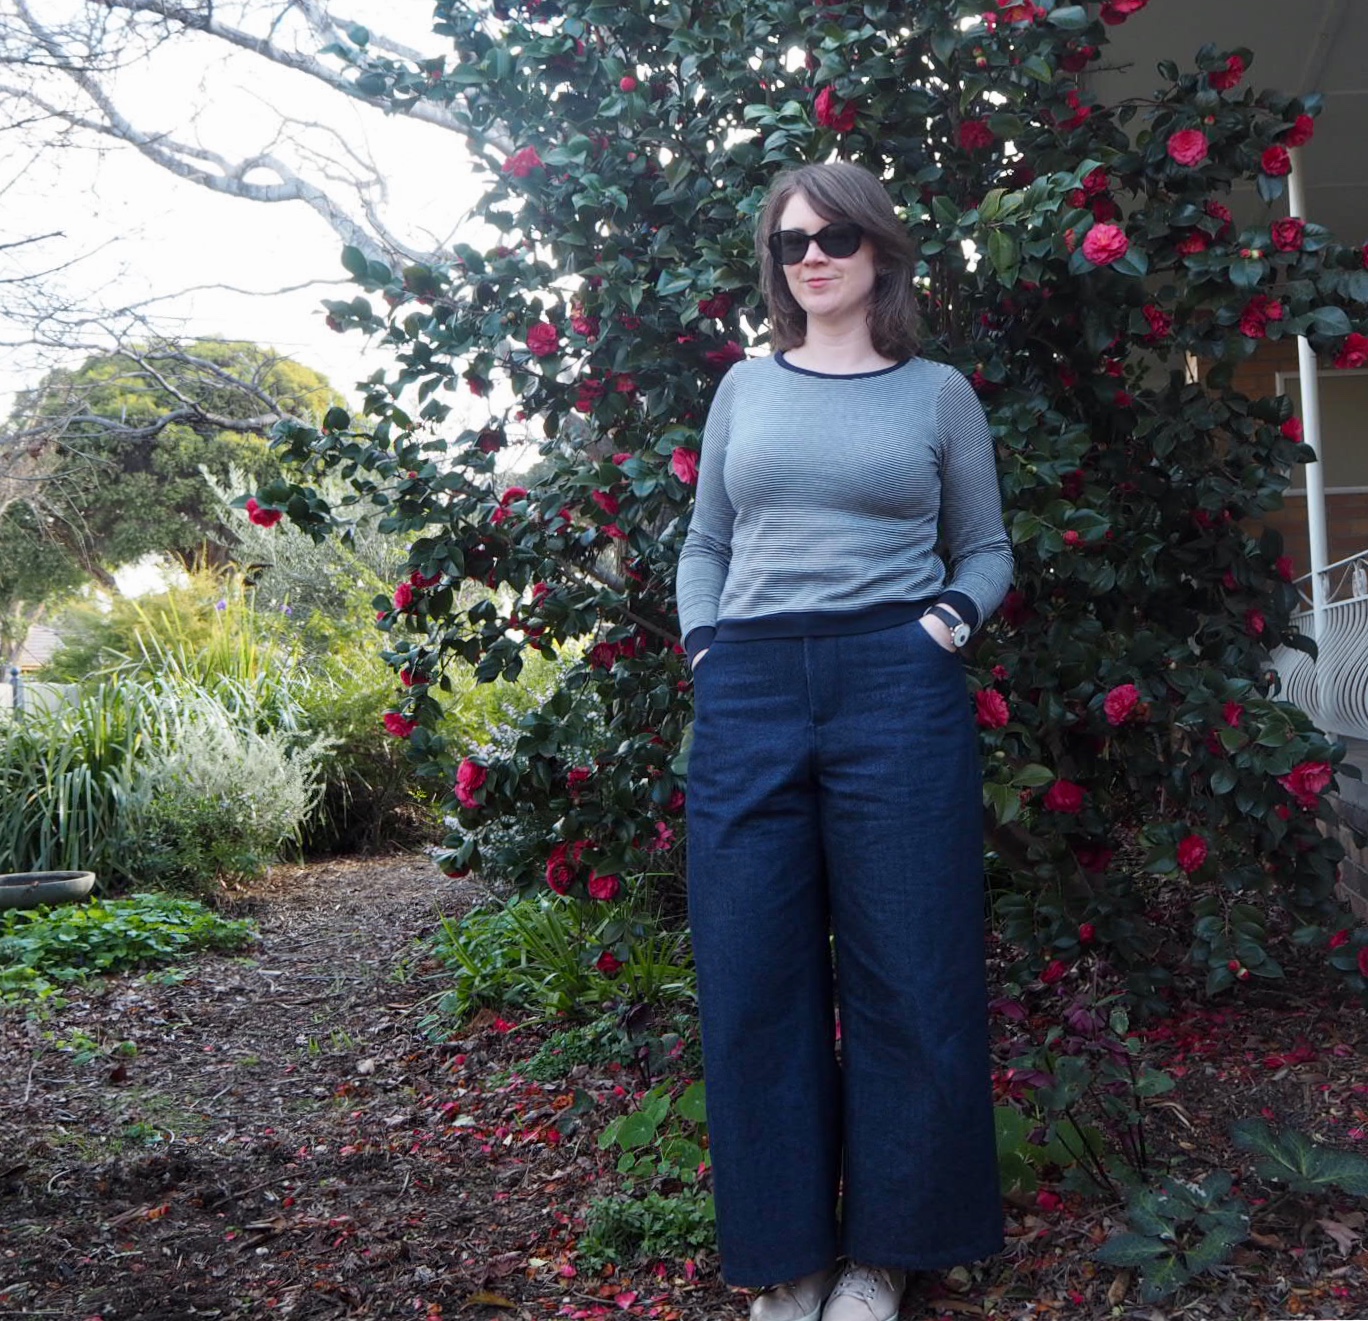
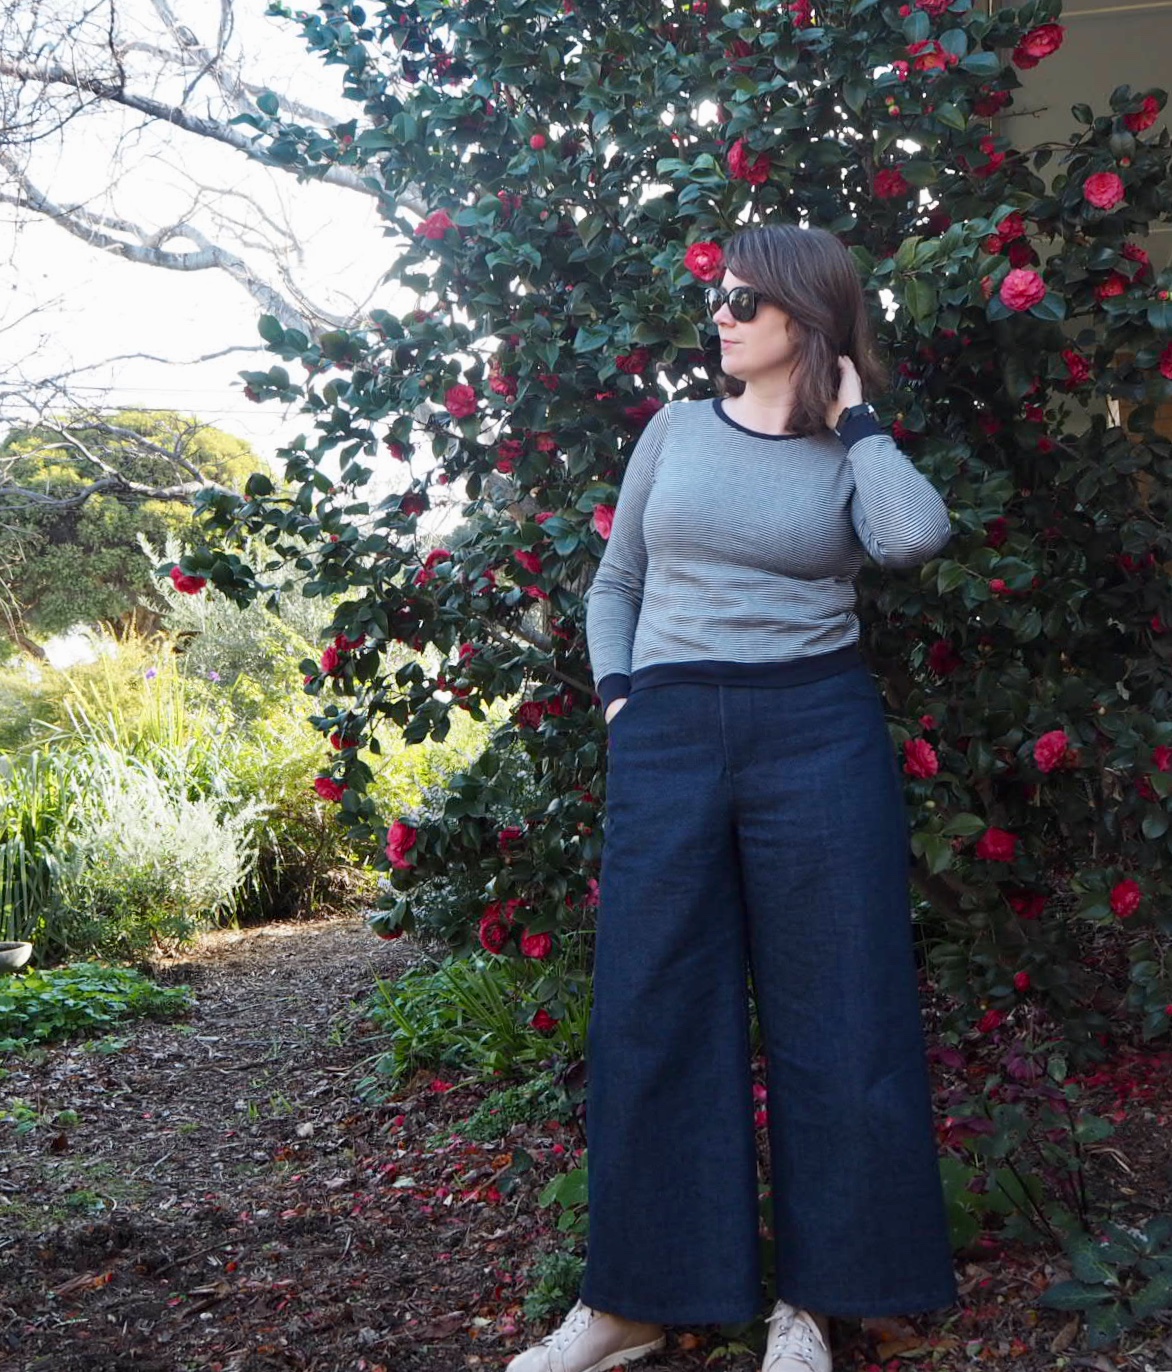
Finished! Denim wide leg pants plus Pin Up Sweater - a most fun outfit.
Are you on the Sew Liberated mailing list? She’s got some
wise thoughts, has Meg. Recently she send out some such thoughts on pants, body
image and weight fluctuation and one of her pearls of wisdom was that one
should have a great, comfortable, well fitting pair of pants in your current
size, one size up, and one size down. I’ve spent the last 12 months waiting for
the rest of my baby weight to shift, and it’s been slow going. A combination of
broken sleep, illness, general mama exhaustion and a reluctance to
significantly cut calories in case it affects my (dwindling) milk supply has
been my excuse/reason (depending on my state of mind). Recently I came to the
conclusion that I (a) didn’t want to buy any more RTW pants, (b) I didn’t want
to make anymore elastic waist pants for a while. I decided some wide leg pants
would be easier to fit than fitted leg and pondered the options out there. The
Persephones look fun for sure, but I don’t like the gaping / pulling that I see
across many of the flies and I felt I needed a pattern with a fail safe zip fly
draft so that I could practice on and therefore have the confidence to perhaps
tweak some future Persephones. I’ll admit that I own the Landers, the
Persephones, and the Dawn jeans patterns, but I elected to go with the free
Peppermint magazine Wide Leg Pants pattern, drafted by Emily from In the Folds.
It ticked many of my boxes - zip fly, full length pocket pieces incorporated
into the fly (a bit like a pocket stay - helps keep the tummy tucked in and
prevents the waistband stretching out with wear), side seams and darts for
fitting tweaks and a curved waistband. And of course it comes with an A0
printing option.
I toiled my first version in calico (muslin if you’re in the USA) cut to shorts length, in a size E, which was foolish. My measurements put me 100% in size F. I don’t know what I was thinking. I added extra seam allowance to the side seams and needed all that extra room. They were way too tight/short in the front crotch. But I could at least see that the waistband would fit beautifully, the rear darts would be a touch long and that I’d probably need (unsurprisingly) a small swayback adjustment.
So size F it was. I still took precautions and added an
extra 1cm to the side seams, plus an extra 5mm length to both the front and
back crotch lengths at the inseam. Turns out I didn’t need the extra wiggle
room of the side seam but the extra crotch length was definitely worthwhile. I
shortened the darts by 1cm, made a small swayback adjustment of about 10mm at the
centre back, and cut the longest length, and that’s it for pattern adjustments.
During pocket construction I sewed a line about 1/4 of the pocket width in in
the vertical plane to prevent items ending up at my crotch as the pocket bags
are huge, extending across the whole front from side seams to fly. No other
tweaks (who am I?!). The fit is bang on - snug in the right places, the curved waistband is terrific - I'd just add some length if you are tall (I am 178cm for reference).
I think it’s a beautifully drafted pattern and I can’t
believe it’s free. There are a couple of errors in the instructions - the fly
shield and fly piece are mislabeled in terms of how many pieces to cut, which
meant I ended up installing my fly reversed (I think) but I prefer it opening
this way (like jeans). A couple of overlocking/neatening steps are missed in
the written instructions but the diagrams show it, so I took care to follow
both written and diagrams together. Some of the instructions are a bit brief in
achieving a really nice finish, but if this isn’t your first trouser rodeo
you’ll be fine (you could always look at other tutorials, say for nice
waistband finishes etc). I did deviate from the order of construction, leaving
the side seams last so I could play with fit.

I’ve read a few reviews that comment the fly instructions
aren’t great. It’s really been years since I’ve made a fly zip, so consider
myself a beginner all over again for a fly zip, and I found these instructions
to be fine. I had really no dramas in getting a lovely fly straight up. Not a
single stitch unpicked!

My fabric is a decent quality non-stretch heavy indigo
denim from Spotlight. The pockets are cotton scraps from stash and I used the
same fabric to make some bias to keep the hem length (the cropped length looked
silly on me). I chose to make the inner waistband in the same denim too, which
caused a little angst with bulk in turning nice corners and sewing the
buttonhole. Probably should have used something lighter but it’s not too
dreadful. In case my fly was terrible I went with navy top stitching, which
kept things subtle/disguised.
I did consider adding rear pockets, both to break up a
big expanse of backside and as I tend to stuff a lot of things into my back
right jeans pockets whilst my giant babe is on my left hip, but my advice crew
told me they looked fine without. And test driving these has proven those front
pockets are ample for hankies, keys, small matchbox Kombis, baby intercoms and
other necessities.


I’m so pleased with the fit, and I would be happy to
devote a day of alteration to them in the future should I drop more weight -
unpicking the waistband, taking in some darts and side seams wouldn’t be too
much work. These took about 3 weeks, from toile to finished project, and
probably would have taken 2 if winter sickness did not, yet again, visit our
little household. I’ll absolutely be using this pattern again come summer for some
shorts. But I think I’ll move the zip to the side seam - a fly does add bulk
over the abdomen, and I love the look of a smooth flat(tish) front. And I’ve
now got the confidence to tackle those cool girl Persephones for summer - some
nice heavy linen-cotton in my stash has a tentative reservation on it.
Being a new silhouette for me on the bottom half
necessitated much Pinteresting on how to style wide leg pants/jeans,
particularly in winter. Obviously one needs balance, and, for someone ample of
hips and bum, waist definition. I have a couple of cropped jumpers/sweaters in
my wardrobe but nothing that was just the right length. So what’s a girl to do
but find a solution. A cropped, fitted sweater/jumper was in order.

I considered the Seamwork Astoria (I do have the pattern)
but on close inspection of many many versions, plus the shape of the armscye
and sleeve pattern pieces, I decided that it would be too wide across the
shoulders for me. It kind of looks halfway between a set in sleeve and a
dropped shoulder. I’ve got narrow shoulders compared to the rest of my body. I
really should do more narrow shoulder adjustments. Anyway. I digress. I turned
to my copy of Gertie Sews Vintage Casual and came across the Pinup Sweater
pattern. It was perfect as it had a cropped variation, so Gertie had done all
the work for me. I made a size 8 in the shoulder, grading up to a 10 in the
bust and waist, with my standard 1.5cm forward shoulder adjustment.
The fabric is a navy and white striped cotton sweater
knit harvested from an old Ben Sherman jumper of my husband’s that had a mark
on the front and didn’t fit him anymore. I am a very bad blogger/refashioner as
I failed to take the prerequisite Before shot (see above first paragraph for
reasons similar to slow weight loss). You’ll have to believe me when I tell you
it had a navy banded neckline, cuffs and hems with navy patches on the elbows.
I would have loved to reuse all of these, plus the elbow patches, but the
position wasn’t right, and the neckband was weirdly applied and not
salvageable. The cuffs and waistband have gone into my ribbing stash for the
boy, and I used some beautiful quality cotton Lycra ribbing from Wattle Hill Fabrics. We are so lucky in Australia to have multiple suppliers of excellent
quality ribbing. In addition to Wattle Hill I highly recommend Maai Designs,
Seamstress Fabrics and Crafty Mamas Fabrics for an enormous range of ribbing in
colours, sparkles, rainbow or stripes. This ribbing behaved like a dream and I
feel my neckband is definitely one of the best I’ve ever done.

I just love this little top - I think the fit is great. I
know it’s pretty busty but it won’t be forever. I think it looks perfect with
these pants and the whole outfit makes me feel like a million bucks. Which as
we all know isn’t always the easiest thing to achieve in the early years of
being a mama. I can’t wait to wear this outfit into spring, then start styling
these fab trousers with some short sleeve tops as the weather warms up!
I love it, you look fabulous! And I love Meg's message which you've shared here. I've had two kids and your body just changes a lot going through childbearing. My two cents? Postpartum is a hard enough time without going on a diet. Try to eat healthy food and cut yourself some slack. Get some clothes that fit your bod and make you feel good (like this fantastic outfit). As my mom wisely told me "we women get to have so many different bodies."
ReplyDeleteThanks so much! Xx
DeleteGreat pants. I'm trying pleated next, an old burdastyle pattern for a linen blend and something similar to this from simplicity for a non-stretch denim. Hope I get similar success to you!!
ReplyDeleteThanks lovely! Hope they’re a raging success for you! Xx
DeleteGorgeous! I think these pants would also work with a drapey (potentially even scanty - I'm thinking cami?) top tucked in, too. I love this pattern and not only because it saved me like $30 buying the cool kids wide leg patterns. :)
ReplyDeleteThanks Lia - yes I’m looking forward to getting back into wearing some ogden camis this summer. It’s a great pattern - I hope it works for you too x
Deletethey look tasty
ReplyDelete