Free and fabulous - the Lago tank and Spring shorts
Next up in my resort collection (can I also call it a spring/summer maternity capsule wardrobe? I reckon it qualifies!) are two patterns that are not designed for maternity, but with some little tweaks I have made them work for me. I'm well aware that my current sewing habits are going to be of little interest to the majority of seamstresses, however these two patterns are not only non-maternity, but are terrifically drafted AND free. So stay with me even if you're booooored of maternity sewing - you just might discover a winner!

One of my favourite styles of tank for exercise and warm weather is the fitted scoop tank. I've been wearing some Witchery RTW cotton-lycra versions for years, to the point where the cotton threads are literally wearing out leaving nothing but the lycra behind. I did rub one off several years ago but never really managed to finish the armscye and neckline as well as I would like. So when Itch to Stitch released the free Lago tank earlier in the year I was super keen to give it a try. This is the first Itch to Stitch pattern I have tried. I know they are very well regarded in the sewing world, and I do have the Bonn Shirt/Shirtdress also in my pattern collection, but for the most part the other styles haven't really floated my boat.
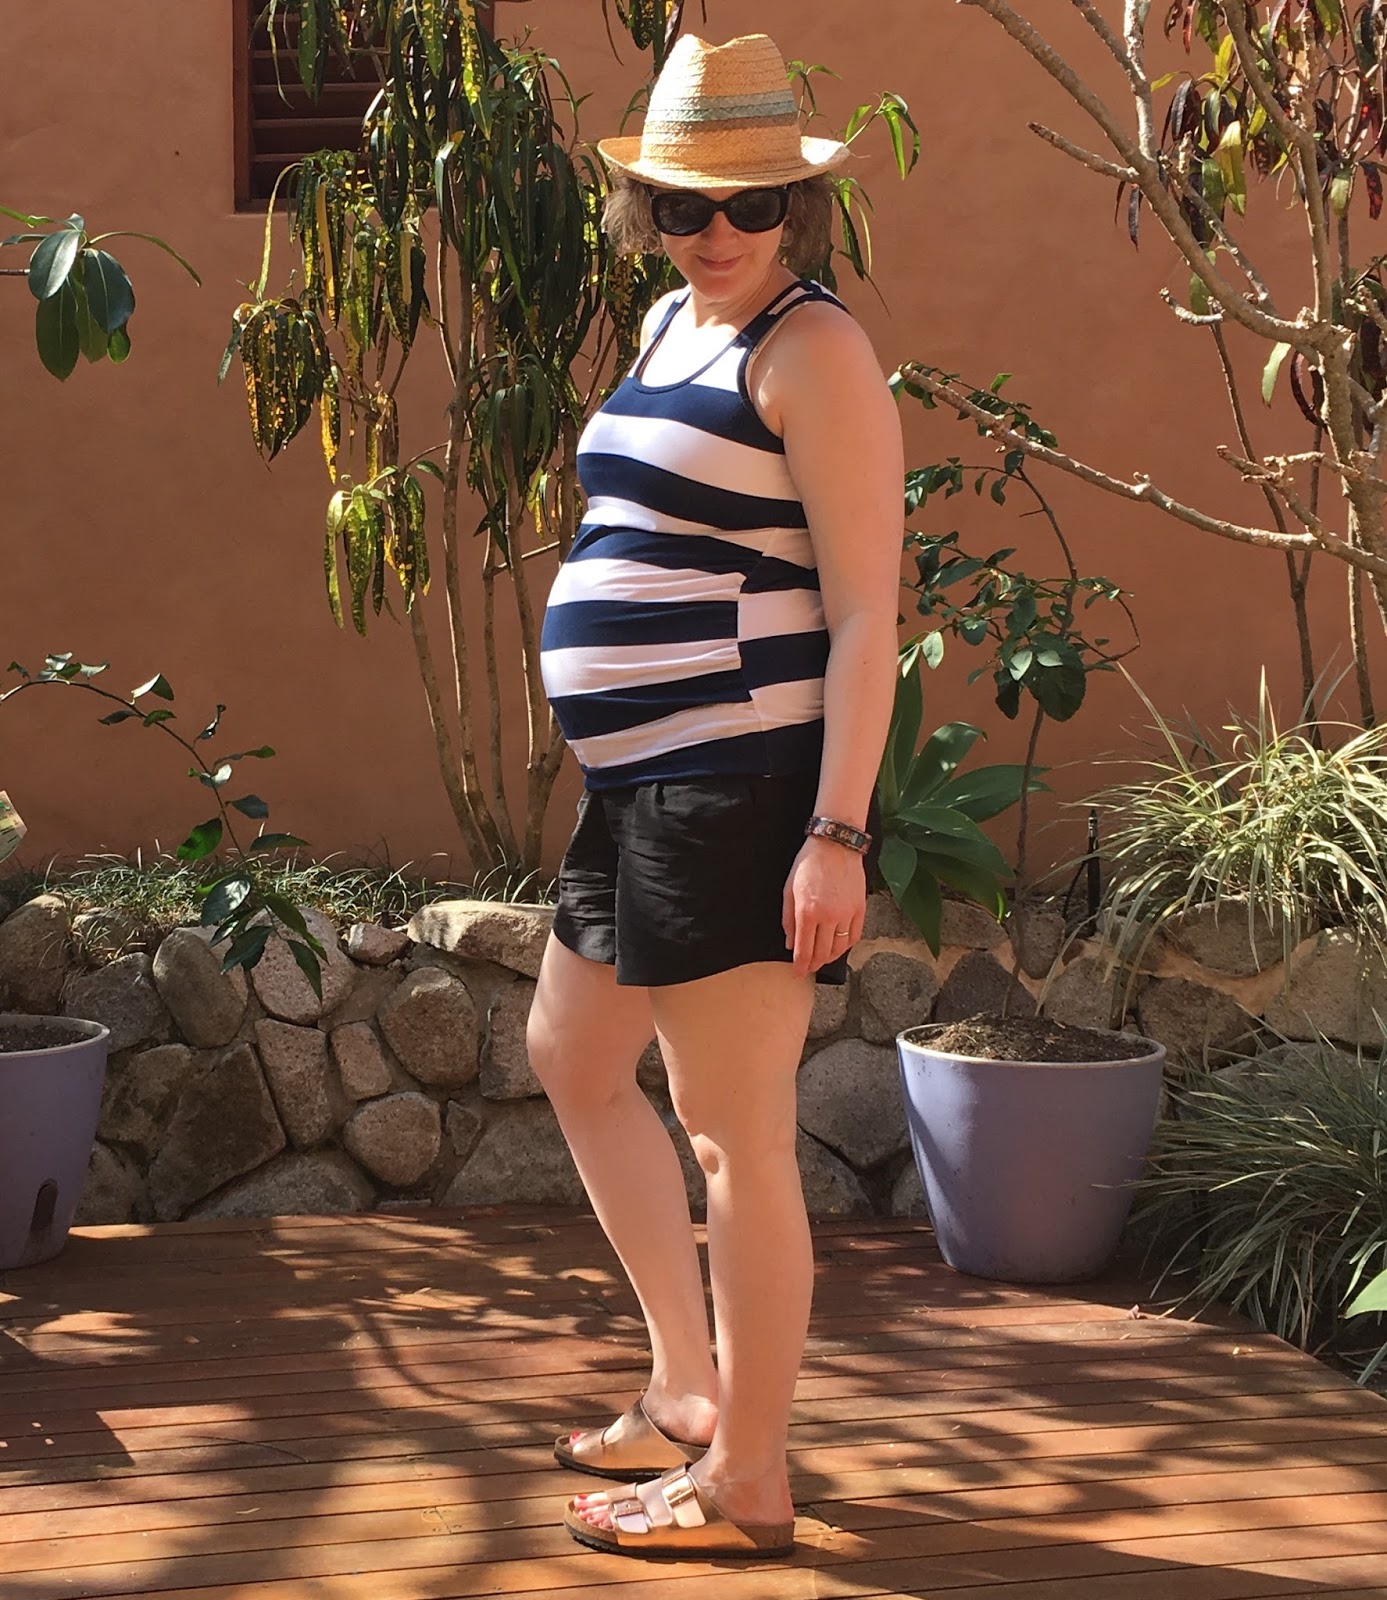
The tank is described as having a relaxed fit, finished with arm and neck bands, and hip length. The size range is pretty terrific, ranging from 00 to size 20 (12 sizes!). Due to the fit being 'relaxed' and my preferred fit being snug I decided to cut my pre-pregnancy sizing and see where that took me - a size 4 in the shoulders/armscye, a 6 in the bust and grading up to the 8 in the waist. I cut the longest length just for a bit of insurance, and added a few extra inches of length to the front piece using this wonderful tutorial from So Zo for a bit of belly ruching action. Following Zoe's advice I also drafted a hem band for my first version, which I have not photographed but is a fairly drapey viscose/lycra knit. I think from memory I ended up cutting some length off that one as it was too long and earlier in my pregnancy looked a little bit like a grey jellyfish with all the extra fabric (it's filled out nicely now though!). For this striped version, in a cheap cotton lycra (with printed stripes - pffft!) I didn't bother with the hem band and just relied on the extra length. Fit wise I'm very pleased - you can see that my bra straps are visible but I do suspect this is because I am now having to wear maternity/nursing bras which have much wider straps that seem to sit further out than my regular bras. I've not seen anyone else's straps peeking out so that's my theory anyway. A racer back bra would solve any visible strap problems pretty quickly.

I think it's beautifully drafted - the bands for finishing the armscye/neckline are the perfect length and it all came together very satisfactorily. The seam allowances are 1cm or 3/8 of an inch - a nice compromise for seamstress that want to sew on either a standard machine or overlocker. The pattern has the option to turn off other sizes when printing and the instructions are top notch. I'm super impressed and I'll definitely be making more of these in the future.
My shorts are made using the Spring Shorts pattern, a collaboration between Peppermint Magazine and Pattern Runway. As drafted these are a high waisted drawstring short, with a paperbag waist and a very cute faced hemline. Clearly not a look that was going to suit my current shape, but seen to very stylish effect here and here in all their high waisted glory. I think these shorts look best made in a drapey or very soft fabric - the only suitable fabric I had in my stash was some beautiful linen-rayon from Darn Cheap Fabrics that I really wished I had bought more of. It's a great fibre combination.

I decided to take a punt on adapting this pattern after purchasing a pair of RTW maternity shorts made from tencel online. The fit of these RTW shorts is decidedly average around my (even fuller) thighs and rumpage (no surprises there) however I was intrigued by how they were drafted in a woven fabric and for a growing belly. Essentially the centre front was a couple of inches lower than the back, curving up at the side seams to meet the back pieces. The elasticated waistband is quite wide, ensuring it does't cut into the belly, but instead sits below one's bump at a nice flat angle. The elastic is also adjustable, using a genius method where part of one of the waistband facing seams is left open at one side seam, and a loop of excess elastic is left hanging out but stitched to itself. As your belly grows you unpick the stitching and suddenly there's more room - so clever!
So slightly disappointed by the fit of my RTW version I was determined the day before we left that I was going to have a crack at a pair of my own. I figured the Spring Shorts were the perfect starting point - all I needed to do was measure the front and back crotch depths of my RTW version to lower the waistline to where it needed to be, and work out the waistband/elastic method (which to be honest I already had done with a pair of Hudsons a couple of weeks prior). I cut the largest size (16) and added an extra inch to the length. I was concerned I might need to play with the pockets, as I was removing a good couple of inches of height from the pocket openings, hence reducing their size, but that wasn't necessary. From memory I lowered the centre front by about 5 inches (!) and the back front side seams by a couple, curving up the CF in a nice line. If you wanted to make these for a non-pregnant bod but without the super high rise waistline it would be so simple to just take a couple of inches evenly off the front and back.

The waistband width I narrowed by about 1cm, which eliminated the paper bag look and made it a fairly snug fit for my elastic. I did have a brainfart at this point and neglected to actually MEASURE the circumference of the waistline and had to patch in some extra fabric at the back to make ends meet. As such the side seams of the waistband don't quite match up with the side seams of the shorts.
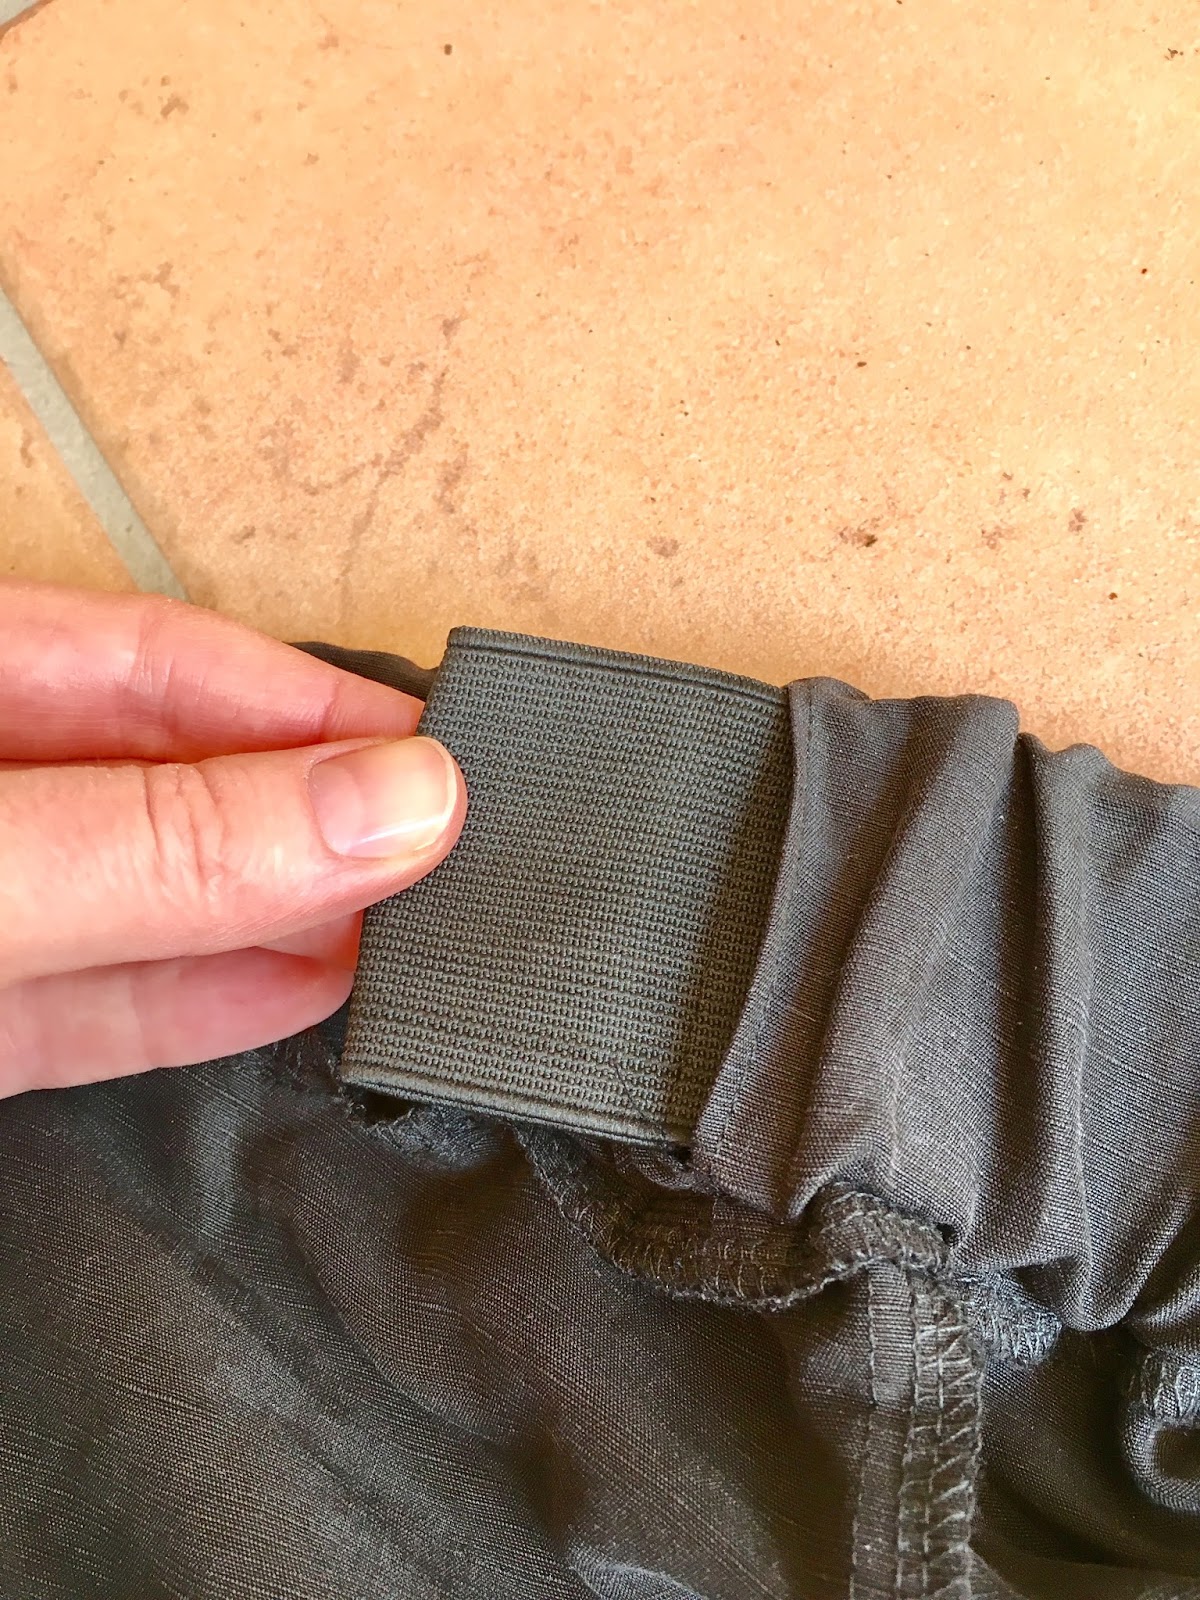
To construct the adjustable waistband elastic I left part of the seam open, top stitched the edges before attaching to the waist to prevent fraying and then added some elastic with an extra 3-4 inches of length, pulling it tight until comfortable then stitching the elastic to itself. If I need some extra room I can just unpick that stitching and restitch a little further out. So simple!
The drafting of this pattern is also spot-on. I ended up removing that extra inch of length - they really looked super frumpy - like a sack dress the volume of the gathered waistline needs to be balanced by a sassy short length. The hem facings fit perfectly and I just love that slight raise at the sides.

In terms of comfort they're great. I could probably have gotten away with the size 14, rather than the 16 but when a girl has no idea just how big her bottom is going to become that little bit of wiggle room is a nice piece of insurance. My sexy stability belt fits underneath comfortably, and with a nice snug long top like my Lago Tanks I don't feel like I'm going to lose my pants. I have worn these with a Hemlock tee, but needed to wear a belly band to ensure my ab didn't flash the world. But in the interest of fit and furthering sewing knowledge I will give you a just a little glimpse of how and where they sit on my tummy.....

Have I convinced you on the fabulousness of both of these patterns?
One of my favourite styles of tank for exercise and warm weather is the fitted scoop tank. I've been wearing some Witchery RTW cotton-lycra versions for years, to the point where the cotton threads are literally wearing out leaving nothing but the lycra behind. I did rub one off several years ago but never really managed to finish the armscye and neckline as well as I would like. So when Itch to Stitch released the free Lago tank earlier in the year I was super keen to give it a try. This is the first Itch to Stitch pattern I have tried. I know they are very well regarded in the sewing world, and I do have the Bonn Shirt/Shirtdress also in my pattern collection, but for the most part the other styles haven't really floated my boat.
The tank is described as having a relaxed fit, finished with arm and neck bands, and hip length. The size range is pretty terrific, ranging from 00 to size 20 (12 sizes!). Due to the fit being 'relaxed' and my preferred fit being snug I decided to cut my pre-pregnancy sizing and see where that took me - a size 4 in the shoulders/armscye, a 6 in the bust and grading up to the 8 in the waist. I cut the longest length just for a bit of insurance, and added a few extra inches of length to the front piece using this wonderful tutorial from So Zo for a bit of belly ruching action. Following Zoe's advice I also drafted a hem band for my first version, which I have not photographed but is a fairly drapey viscose/lycra knit. I think from memory I ended up cutting some length off that one as it was too long and earlier in my pregnancy looked a little bit like a grey jellyfish with all the extra fabric (it's filled out nicely now though!). For this striped version, in a cheap cotton lycra (with printed stripes - pffft!) I didn't bother with the hem band and just relied on the extra length. Fit wise I'm very pleased - you can see that my bra straps are visible but I do suspect this is because I am now having to wear maternity/nursing bras which have much wider straps that seem to sit further out than my regular bras. I've not seen anyone else's straps peeking out so that's my theory anyway. A racer back bra would solve any visible strap problems pretty quickly.
I think it's beautifully drafted - the bands for finishing the armscye/neckline are the perfect length and it all came together very satisfactorily. The seam allowances are 1cm or 3/8 of an inch - a nice compromise for seamstress that want to sew on either a standard machine or overlocker. The pattern has the option to turn off other sizes when printing and the instructions are top notch. I'm super impressed and I'll definitely be making more of these in the future.
My shorts are made using the Spring Shorts pattern, a collaboration between Peppermint Magazine and Pattern Runway. As drafted these are a high waisted drawstring short, with a paperbag waist and a very cute faced hemline. Clearly not a look that was going to suit my current shape, but seen to very stylish effect here and here in all their high waisted glory. I think these shorts look best made in a drapey or very soft fabric - the only suitable fabric I had in my stash was some beautiful linen-rayon from Darn Cheap Fabrics that I really wished I had bought more of. It's a great fibre combination.
I decided to take a punt on adapting this pattern after purchasing a pair of RTW maternity shorts made from tencel online. The fit of these RTW shorts is decidedly average around my (even fuller) thighs and rumpage (no surprises there) however I was intrigued by how they were drafted in a woven fabric and for a growing belly. Essentially the centre front was a couple of inches lower than the back, curving up at the side seams to meet the back pieces. The elasticated waistband is quite wide, ensuring it does't cut into the belly, but instead sits below one's bump at a nice flat angle. The elastic is also adjustable, using a genius method where part of one of the waistband facing seams is left open at one side seam, and a loop of excess elastic is left hanging out but stitched to itself. As your belly grows you unpick the stitching and suddenly there's more room - so clever!
So slightly disappointed by the fit of my RTW version I was determined the day before we left that I was going to have a crack at a pair of my own. I figured the Spring Shorts were the perfect starting point - all I needed to do was measure the front and back crotch depths of my RTW version to lower the waistline to where it needed to be, and work out the waistband/elastic method (which to be honest I already had done with a pair of Hudsons a couple of weeks prior). I cut the largest size (16) and added an extra inch to the length. I was concerned I might need to play with the pockets, as I was removing a good couple of inches of height from the pocket openings, hence reducing their size, but that wasn't necessary. From memory I lowered the centre front by about 5 inches (!) and the back front side seams by a couple, curving up the CF in a nice line. If you wanted to make these for a non-pregnant bod but without the super high rise waistline it would be so simple to just take a couple of inches evenly off the front and back.
The waistband width I narrowed by about 1cm, which eliminated the paper bag look and made it a fairly snug fit for my elastic. I did have a brainfart at this point and neglected to actually MEASURE the circumference of the waistline and had to patch in some extra fabric at the back to make ends meet. As such the side seams of the waistband don't quite match up with the side seams of the shorts.
To construct the adjustable waistband elastic I left part of the seam open, top stitched the edges before attaching to the waist to prevent fraying and then added some elastic with an extra 3-4 inches of length, pulling it tight until comfortable then stitching the elastic to itself. If I need some extra room I can just unpick that stitching and restitch a little further out. So simple!
The drafting of this pattern is also spot-on. I ended up removing that extra inch of length - they really looked super frumpy - like a sack dress the volume of the gathered waistline needs to be balanced by a sassy short length. The hem facings fit perfectly and I just love that slight raise at the sides.
In terms of comfort they're great. I could probably have gotten away with the size 14, rather than the 16 but when a girl has no idea just how big her bottom is going to become that little bit of wiggle room is a nice piece of insurance. My sexy stability belt fits underneath comfortably, and with a nice snug long top like my Lago Tanks I don't feel like I'm going to lose my pants. I have worn these with a Hemlock tee, but needed to wear a belly band to ensure my ab didn't flash the world. But in the interest of fit and furthering sewing knowledge I will give you a just a little glimpse of how and where they sit on my tummy.....

Have I convinced you on the fabulousness of both of these patterns?
Outfit looks great! I wish I felt more comfortable in shorts, as a pair like yours would be the way to go!
ReplyDeleteThanks Bec - shorts can be really hard to get right I think.... I think I was lucky that these turned out so well!
DeleteYou look great! That elastic trick reminds me of my little brother's pants when he was a kid, which had elastic in the back waistband with buttonholes at the ends, which fastened to a button on each side. That way you could loosen the waistband as he grew.
ReplyDeleteThankyou! Yes, my maternity jeans actually have that buttonable elastic too. I’ve seen it in some haberdashery shops but it’s always very narrow and quite thin elastic - perfect for kiddies but not really sturdy enough for my liking! I like this trick so much more! :)
DeleteYou first and foremost convinced me on the fabulousness of you ... I got to check that itch to stitch pattern label :)
ReplyDeleteAw thanks lovely. It’s hard to feel fabulous when one occasionally gets trapped on ones back like an upside down turtle.... so thankyou xxx
DeleteBoth patterns look amazing! I love the summer effect it gives off.
ReplyDeleteThanks so much - I can’t wait for summer to arrive where I love, it was so lovely being on holiday and always being warm!
DeleteSuper, super stylish maternity wear. I love the fabrics you chose and the patterns, which reminds me I need a pair of black shorts and a nice tank as well! I just sent a link of your blogpost to a friend of mine who is expecting and she called me all excited and said: I WANT THE WHOLE OUTFIT!!!! Thank you for sharing all your hacks, I'm sure many mom's to be are just as pleased to see your stylish take on maternity wear! xB
ReplyDeleteThanks hon - I know it’s such a small demographic who’d be interested but it’s nice to share what works and what doesn’t at a time when it’s hard to feel chic and stylish a lot of the time! Xx
DeleteYou are looking amazing Sarah! and everything looks comfortable and very you too. I love the way you're adapting regular patterns to be maternity, so clever of you :)
ReplyDeleteThanks Carolyn! It’s important to me to be able to maintain my own sense of style, be practical and not waste too much fabric or time on things I’m only going to wear for a short while. I think I’ve struck a reasonable balance!
DeleteGood and amazing article! Thank you for sharing such valuable and helpful information and knowledge! This gives us more insights and inspiration. Looking forward to seeing more updates from you.
ReplyDeletematernity bottoms online
so damn exxxciting
ReplyDelete