How to: neat'n'tidy facings
I have mentioned in the past how I found some a great tip on neat neckline and placket facing edges, but I took some step-by-step pics whilst making my recent Test Pattern top that may make it a little clearer. This works for interfacing that is either non-adhesive or is iron-on, but you do just need to make extra sure with iron-on you have the sticky side in the right spot - otherwise you will have a very messy iron and an adhered facing on your ironing board!
1 - Place your fashion fabric wrong side together with the NON STICKY side of your interfacing piece and pin them together.


2 - Sew along the longer curved edge (ie the edge that won't be attached to the garment) about 7mm from the edge (I just lined it up with my foot edge - whats that? A 1/4 of an inch?).


3 - Turn it over and trim the seam even smaller - you can just do the fashion fabric or both.


5 - Finger press it as best you can, lining up all the raw edges, and pin in place with some long or non plastic pins. Keep the pin heads as far away as possible to avoid melting them when you iron. This is a good time to triple check that the sticky surface of the interfacing is INSIDE INSIDE INSIDE! Calmly iron it flat either fashion fabric side up or with a pressing cloth to avoid melting your interfacing like I did.


I love this finish so much, I think I would still do it even if I had an overlocker/serger!
*** Please note I learned this trick off the blog Sew Convert (who I think learned it off someone else!). How awesome are sewing bloggers sharing their ideas?!
1 - Place your fashion fabric wrong side together with the NON STICKY side of your interfacing piece and pin them together.


2 - Sew along the longer curved edge (ie the edge that won't be attached to the garment) about 7mm from the edge (I just lined it up with my foot edge - whats that? A 1/4 of an inch?).


3 - Turn it over and trim the seam even smaller - you can just do the fashion fabric or both.

4 - Turn it inside out and use a chopstick or point turner or knitting needle to GENTLY push out the curve. Its very easy to stab holes in light interfacing. Its not a big deal though really as its all going to be melted together soon, and wont be visible.... Try and push out the seam as much as you can, you'll only get one chance to iron it....
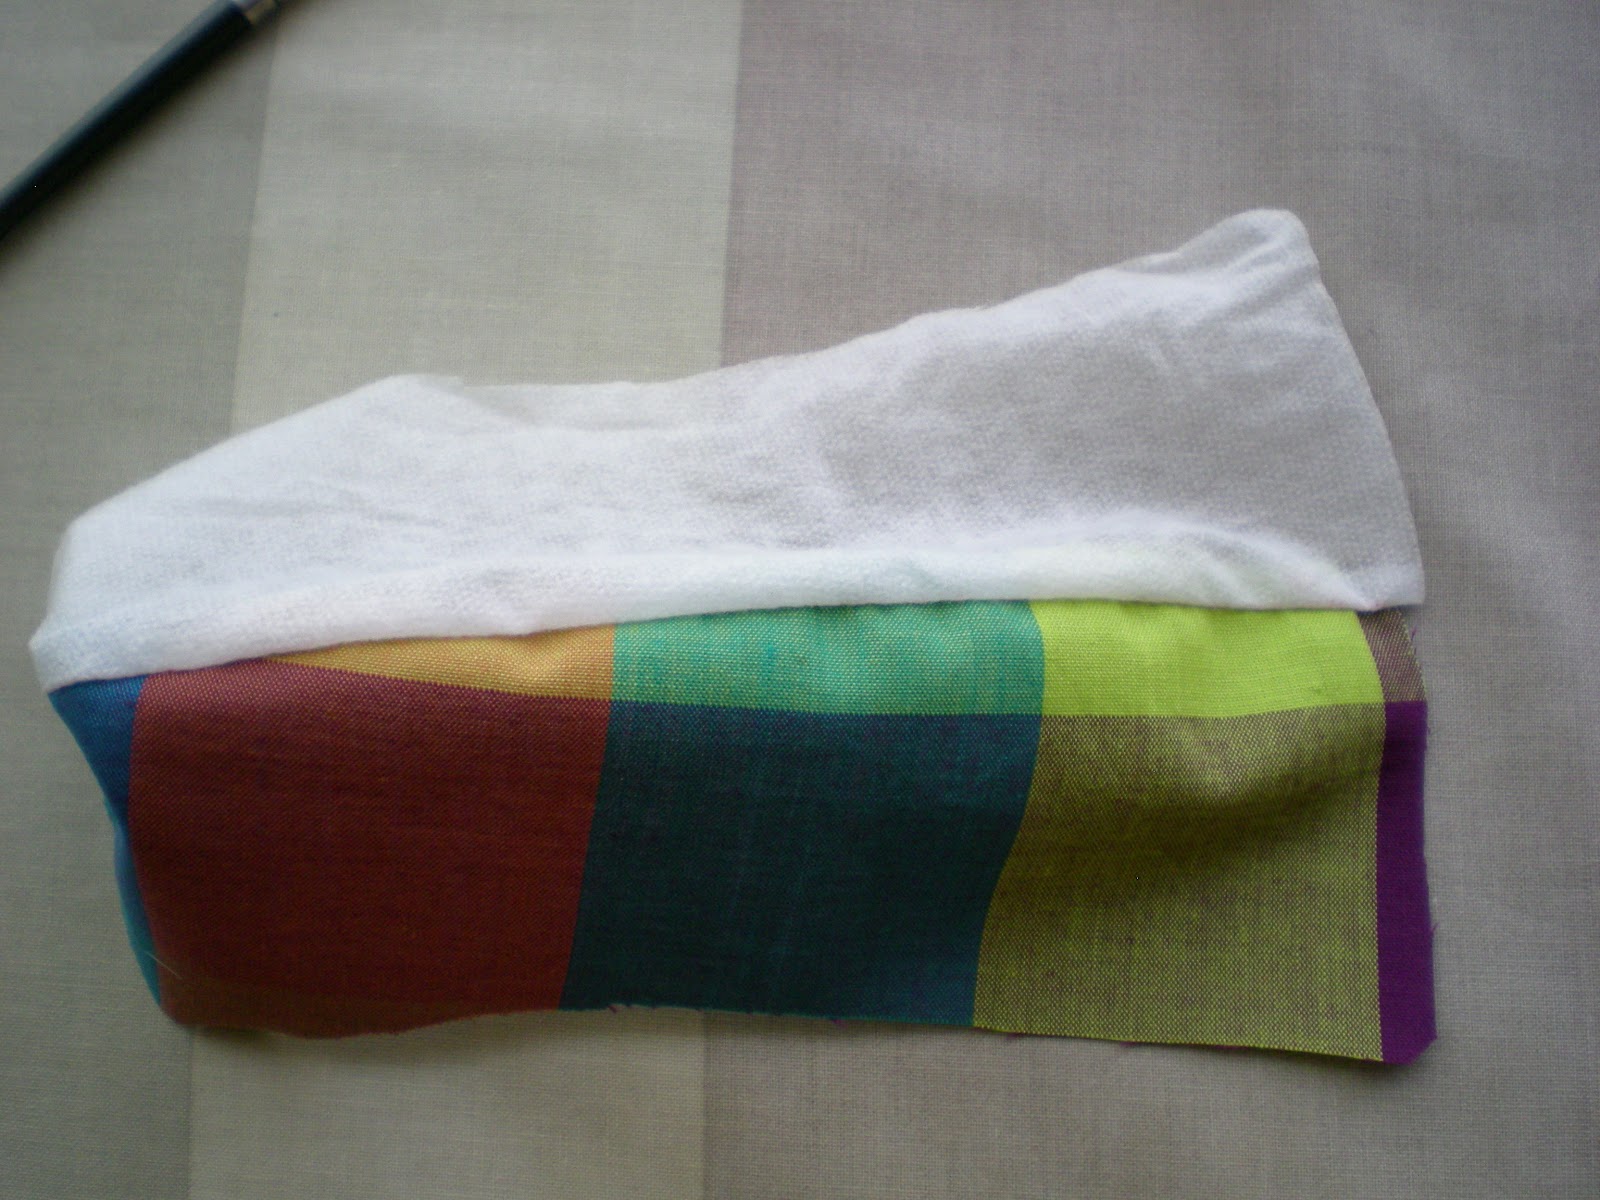

5 - Finger press it as best you can, lining up all the raw edges, and pin in place with some long or non plastic pins. Keep the pin heads as far away as possible to avoid melting them when you iron. This is a good time to triple check that the sticky surface of the interfacing is INSIDE INSIDE INSIDE! Calmly iron it flat either fashion fabric side up or with a pressing cloth to avoid melting your interfacing like I did.


 |
| A little melted.... |
6 - So now you should have a lovely non-bulky facing to attach to your neckline or placket or wherever with an awesomely perfect neat non-fraying edge.


 |
| Oooh labels!! (I had these printed because there are some things I have made where I can't easily tell the front from the back. Sad I know.) |

I love this finish so much, I think I would still do it even if I had an overlocker/serger!
*** Please note I learned this trick off the blog Sew Convert (who I think learned it off someone else!). How awesome are sewing bloggers sharing their ideas?!
Comments
Post a Comment